Light Speed Controller (LSC) Set Up Instructions
Tools required
To carry-out the LSC upgrade, you will need: a ruler, Origin Live Turntable oil, clean tissue paper, Bubble Gauge.
Origin Live’s Light Speed Controller (LSC) is quick and easy to install. If you are performing an upgrade, these steps will require approximately 10-15 minutes work.
Step 1
Remove the drive belt and store safely.
Step 2
Remove the original motor pod.
Step 3
Carefully lift the platter vertically. Take care to lift evenly by firmly gripping left and right sides of the platter. Place upside-down on a secure surface.
Step 4
Remove any excess oil that pools around the spindle with clean tissue paper.
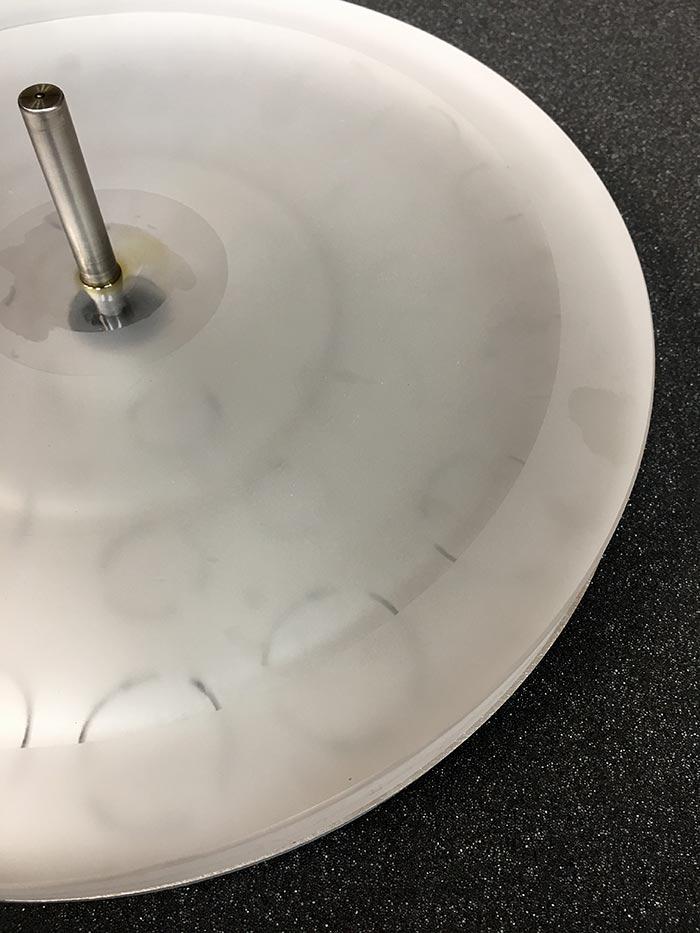
Picture 1: Platter removed.
Step 5
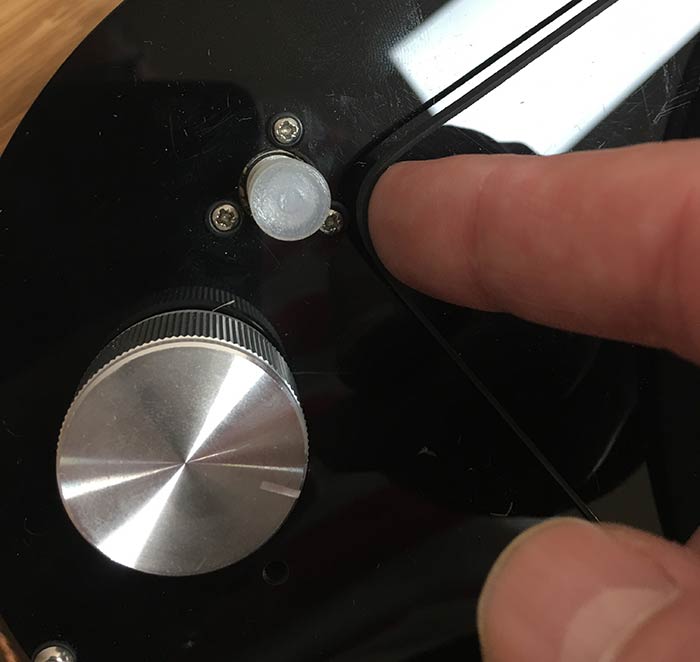
Identify the correct position for the silver strip. It should be no more than 2 mm from the edge of the platter and should point towards the spindle.
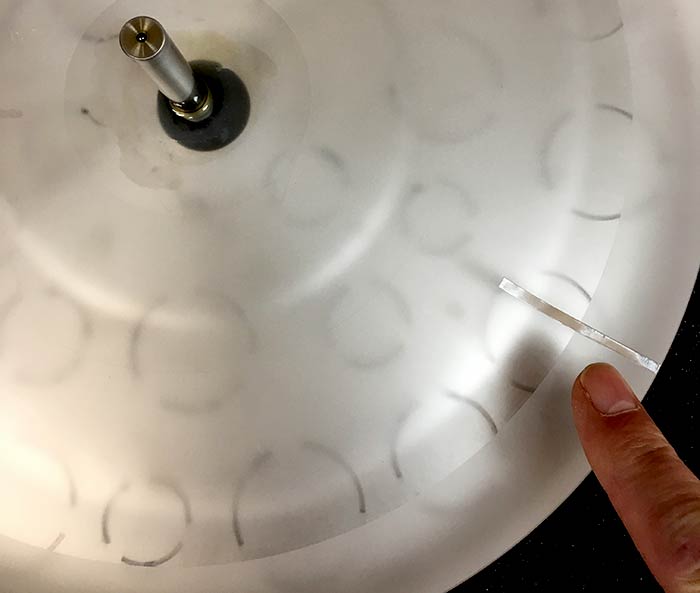
Picture 2: Identify the correct position for the silver strip.
The silver strip must be no greater than 2 mm from the platter’s edge (the closer to the edge the better).
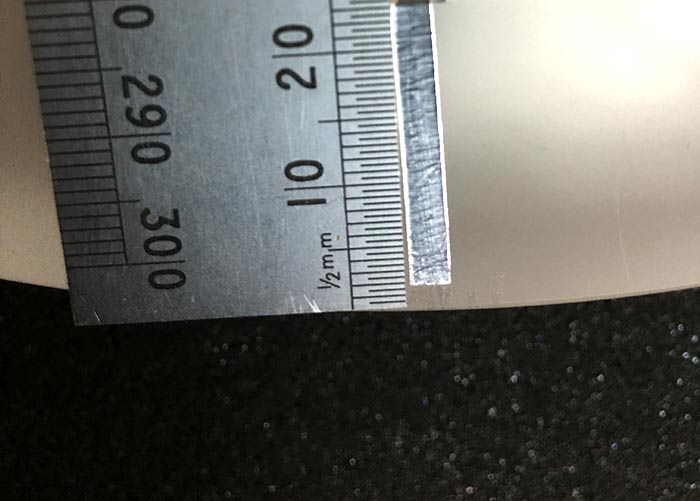
Picture 3: No more than 2mm from the edge.
Step 6
The silver strip must point towards the spindle. In this example, the silver strip is a few degrees out but the LSC will still work perfectly.
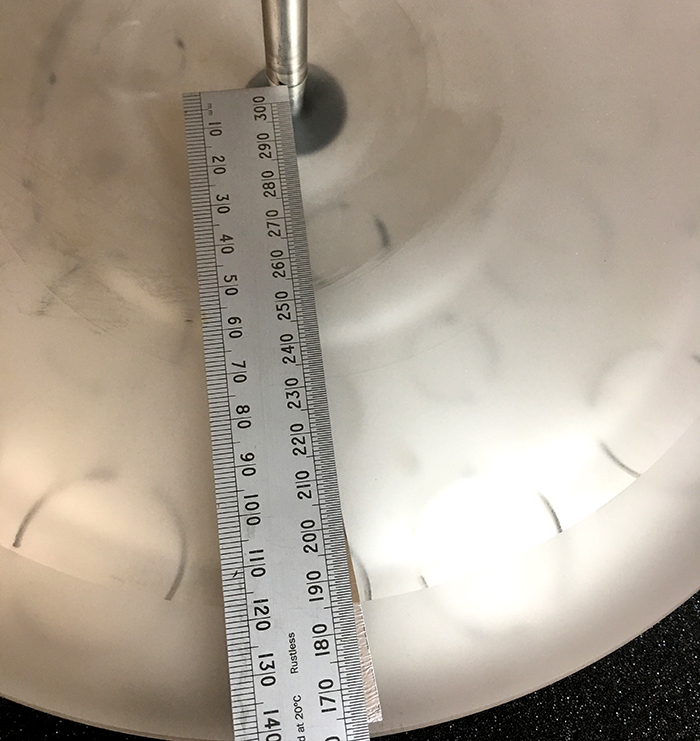
Picture 4: The silver strip must point towards the spindle.
Step 7
If the bearing was well lubricated, add around of 3 drops of Origin Live’s Turntable Oil before gently sliding the platter into position. Make sure the spindle is clean before re-installing the platter and ensure the oil has overflowed as described in the turntable owner manual.
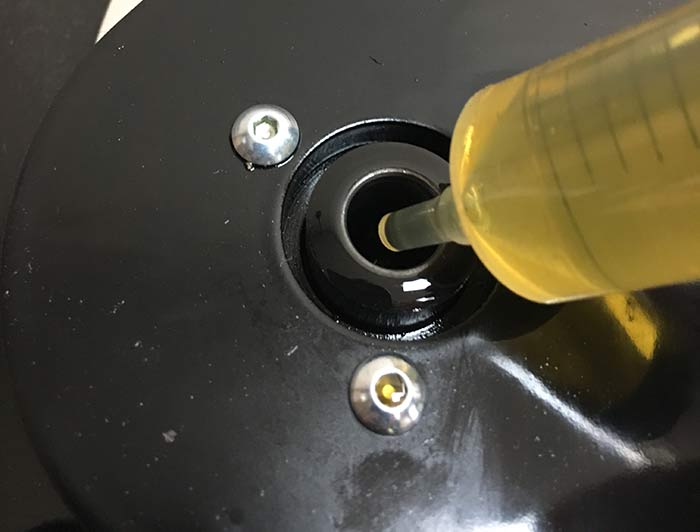
Picture 5: Lubricate the bearing housing.
Step 8
Align the LSC so the 3 LEDs align with the spindle.
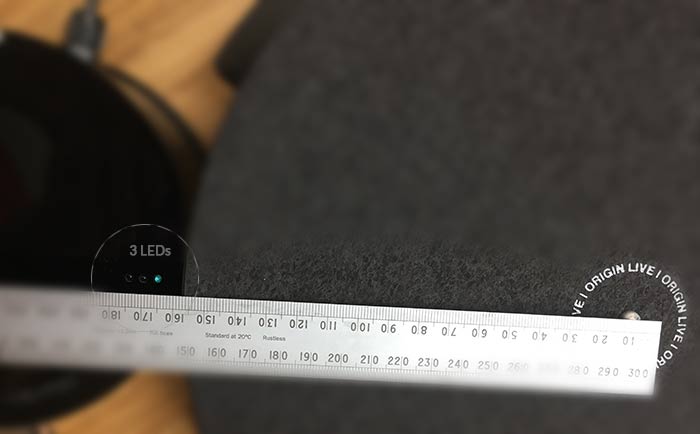
Picture 6: DSC Motor Pod LED’s should align to the spindle.
Step 9
Adjust the turntable height so that it is a minimum of 3 mm above the LSC. Use a bubble gauge to level the turntable.
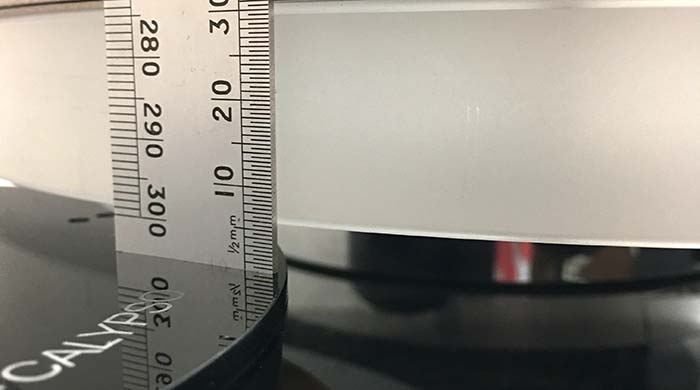
Picture 7: Platter must be a minimum of 3 mm above the LSC Pod.
Step 10
Slide the LSC Pod into position, maintaining LED alignment with the spindle. With the belt “relaxed” i.e. not under tension, position the LSC Pod so that there’s a gap of 5–10 mm between the belt and the pulley as shown in picture 8 below. Once the LSC is positioned, put the belt on the pulley. Turn the LSC Pod on. A blue flashing light indicates that all is well and that the learning phase has commenced.
If the blue LED fails to illuminate:
- Check power is on
- Try raising the turntable very slightly
- Make sure the inner LED (closest to the centre of the Pod) is a minimum of 5 mm beyond the outer-edge of the platter, i.e. looking down from above the platter, no LEDs should be visible.
Picture 8: The LSC Pod must be positioned for correct belt tension.
The Learning Phase
This is a one-time-only and final step in setting-up an LSC. Set the Pod for 33.33 rpm. Once the blue light has started to flash, the turntable speed is being calibrated to 33.33 rpm. The LSC will take approximately 2 minutes 20 seconds to “learn” 33.33 rpm. After 33.33 rpm has been learned, switch to 45 rpm and allow a further 1 minute 20 seconds to learn 45.
A flashing blue light indicates LEARNING.
A solid blue light indicates NORMAL RUNNING in either 33.33 or 45 rpm.
Wait for the blue LED to change from flashing to solidly-on before either; switching-off the LSC or selecting 45 rpm and repeating the learning process for 45.
