Kuzma Stabi Motor & Power Supply Kit Fitting Instructions
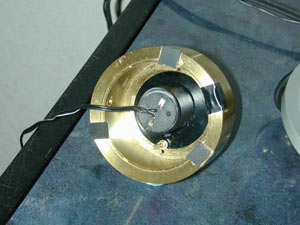
Just thought I’d send some pictures as promised of my Kuzma turntable Stabi S with the new motor. It was actually quite easy to fit. First you need to remove the perforated bottom plate to the motor, using by unscrewing the brass feet. Then it’s a simple case of removing (unscrewing the wires) the power supply components and unscrewing the Kuzma motor. The switch is a bit more complicated as it’s glued in. I used pliers and gentle brute force. The original power cable can now just be pulled out.
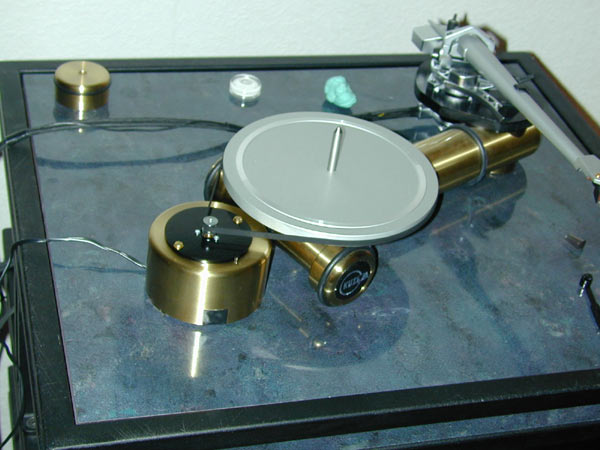
I went for the short pulley motor (DC200). According to my measurements it was a better bet than the long pulley. I was wrong by about half a millimeter or so (motor touches turntable platter). No problem just change the feet. Three new rubber feet do the job perfectly (makeshift for now)
Origin live note that this is not a problem any more because the motor sits down deeper by 1.5mm on current plates.
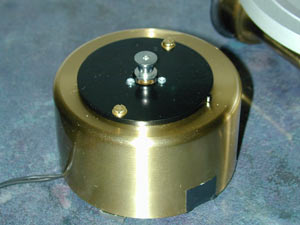
The motor in its round mounting plate can be mounted directly on the top of the empty brass motor pod. With one or two screws – relatively tightly. (See picture). There are two holes for the old motor which are 60mm apart. It’s as simple as that.
The upgrade is well worth it. I’ve had the luck to be able to compare the advanced and ultra motor kits – the ultra wins hands down, but the advanced kit is significantly better than the original AC motor.
In the pictures one of the screws is holding the plate on the inside edge of the motor pod – a sort of pressure fit – you only want a one screw fastening.
I didn’t write too much praising the ultra motor kit, but it’s amazing what a difference it makes. You must have great fun designing and testing new products.