Pink Triangle PT TOO Motor Supply Kit Fitting Instructions
The Pink Triangle PT TOO turntable seems to have varied over the years in a number of details. The following steps are those required to upgrade the turntable motor. The first step assumes you have disconnected the PT TOO power supply and have the turntable on a work bench.
Read these instructions through before you start to fit the motor kit as there are some options that you may like to decide on now rather than when you arrive at them during the modification.
Tools required:
- PT suspension adjusting tool
- PT belt fitting ribbon or equivalent
- Blanket
- Tissue
- Insulating tape
- Philips No1 screwdriver
- Allen Keys (provided in kit)
- Long nosed pliers
- Wire cutters
- Soldering iron and solder (optional) – see 8 below.
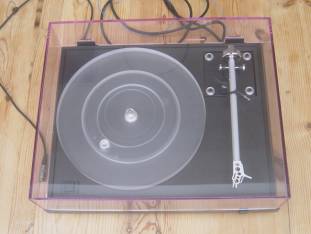
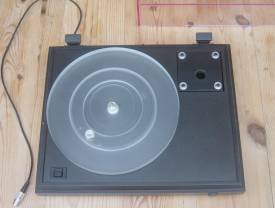
1. Remove lid – just slides out from the hinges on mine.
2. Remove the arm (refer to the arm manufacturer’s instructions for removing the arm). If you don’t want to remove the arm, I recommend that you tape the arm into its rest so it cannot easily pop out if it is knocked during the following procedures and that you protect the stylus in some way.
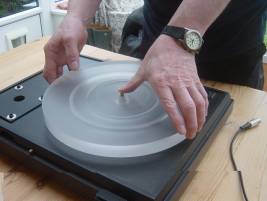
3. Remove the platter. Ensure that you do not remove the top part of the inverted bearing in the process as it can take hours for the bearing to settle properly again due to air being trapped inside. It is best to either get someone to put their finger on the bearing to hold it down as you raise the platter ……
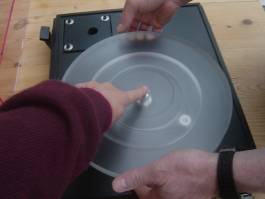
4. or use a thumb to hold it down as you lift the platter with your fingers.The belt will drop off during this procedure – place it with the platter.
5. You now need to secure the sub-chassis to stop lateral movement. Use the transit screw if you have it, otherwise roll up some tissue and place it round the main bearing between bearing and plinth top plate. Place some tape over the top of the bearing and onto the turntable to secure the bearing.
6. Obtain thick padding such as a folded blanket or a suitable size cushion (the blanket is the better option) and invert the turntable plinth, placing it upside down on the padding. Support the bearing as you do this.
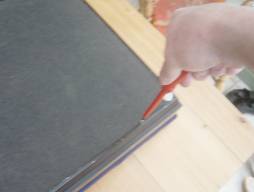
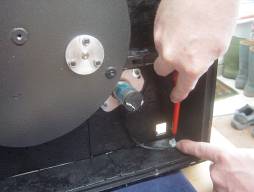
7. Remove the base of the plinth. On mine, this is retained by four small screws with two located on each of the long sides of the plinth base. Note: If you have chosen to leave the arm in place, you may find that on your installation the phono lead out wires pass through a hole in the base. You will need to carefully feed the base along these wires to remove it.
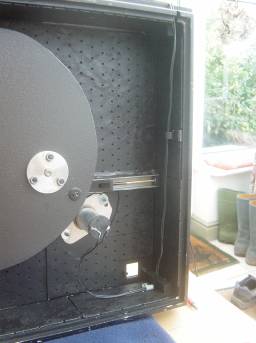
8. Lift the plinth again and sit it on the blanket on its back edge so that the left side of the turntable is facing you. Secure it in this position using anything suitably heavy, such as books or filled boxes. This will allow you to work on the motor fitment from both sides of the plinth. I just happened to have a couple of 56lb weights lying around which are just the job!

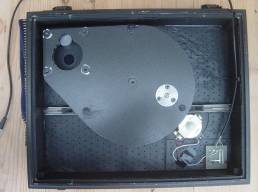
9. There are three options to the removal of the motor, switch and wiring depending on how neat you want the end result to be:
a. Remove the screws in the printed circuit board (pcb) that holds the switch. This allows you to remove the switch, motor and wiring as one so you can re-fit later if required, but leaves a hole where the switch was.

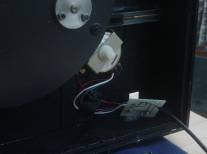
b. Cut all the wires as close to the pcb as possible. Make a note of which wires go where in case you wish to revert to the original set-up. This option allows you to remove the motor and wiring but leave the switch in place.

c. De-solder the wires to the pcb. Make a note of which wires go where in case you wish to revert to the original set-up. This also allows you to remove the motor and wiring but leave the switch in place.
I used option 8a but the following steps apply to any option.
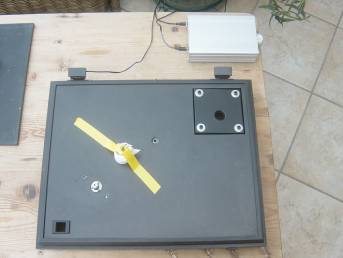
10. Release the wire that goes from the switch to the motor from any cable clamps that might be holding it and then undo the nuts and bolts holding the existing motor.
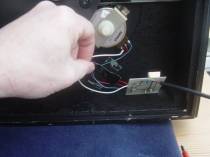
The motor should then come away (together with the wire if you use option 8a).
11. Clean the area around where the DC motor will go, ensuring there is no glue from tape holding wires or any other surface irregularities. This ensures the motor will fit flat against the underside of the plinth top plate. On my turntable the underside of the top plate had bitumastic panels applied (non standard). This was removed around where the motor goes and cleaned with white spirit.
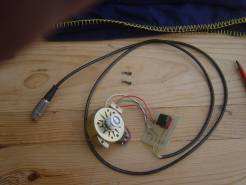
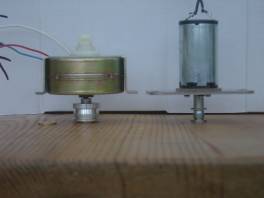
12. Remove the motor from its packaging but leave the power lead taped to the motor for now. The motor comes with fours brass spacing washers to adjust the pulley height between the top of the plinth top plate and the underside of the platter. You will most likely need to use two washers on each side of the motor between the motor mounting plate and the underside of the plinth top plate.To get an indication of how many washers are required, place both motors side by side on a flat surface (pulleys down) with two washers underneath the pulley on the original motor. If the mounting plates of both motors are level two washers are required. If the original motor mounting plate is higher than the DC motor then try it with one washer. Choose the number of washers where the difference in height is smallest.
13. When you know how many spacing washers are required, fit the new motor using the original motor fixing bolts, washers and nuts placing the spacing washers between the motor top plate and the underside of the plinth top plate. The holes in the DC motor mounting plate are large in comparison to the original PT nuts so you will need to use the two silver washers supplied with the kit between the original nuts and the DC motor top plate.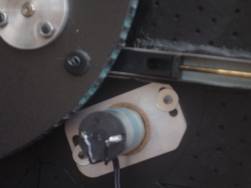
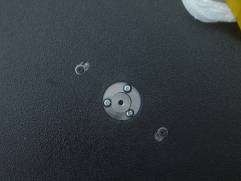
14. You will notice that the three screws that fix the DC motor to its top plate only just fit inside the hole for the original motor. This leaves little or no room for belt tension adjustment and it is IMPORTANT that you fit the DC motor so that these screws do not foul the sides of the hole or underside of the plinth top plate.
 When everything is in the correct position tighten the fixing bolts equally and gradually just to the point that the motor cannot be moved. OL suggest that you experiment with one bolt only holding the motor. Feel free to experiment, but you may find a stable long term arrangement difficult to achieve if your PT TOO, as with mine, requires spacer washers between motor and the underside of the plinth top plate.
15. Using the cable clamp and screw provided, clamp the cable in the front left corner (near to the switch position) being careful to screw into the plinth at its thickest point.
 Position the clamp so that the lead has to turn through 90o towards the motor. This ensures that if the lead is pulled it will be at 90o to the clamp and will not easily pull through and strain the motor.
16. Cut the tape holding the power lead to the motor allowing the wires to hang free of the motor and any other obstructions. Run the wire through any other cable clamps from the original installation and out through the slot in the back of the plinth.
17. You now need to check that the motor height is correct, i.e. that you have used the correct number of spacing washers and that the motor works! To do this:
a. Put the turntable the correct way up (leave the bottom off for the moment) ensuring that the motor power lead exits through the slot in the back of the plinth. Connect the turntable to the Motor Speed control box.
b. Remove the tape and padding from the bearing
c. Re-fit the pick-up arm ensuring that the arm lead-out wires are correctly dressed and do not affect the suspension for the sub-chassis and platter.
d. Replace the platter and belt (if you have never carried out this operation, refer to belt installation at the end of these notes)
e. Level the platter using the heaviest record you are likely to play. This will probably be one of the recent 180 or 200 gramme heavy vinyl re-issues.
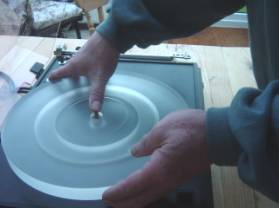
f. Spin the platter by hand. If the motor scrapes against the underside of the platter it is highly likely that you will need to return to step 12 and increase the number of spacing washers. However, go to f. first.
g. Leaving the record in place, plug in the Motor Kit power supply and turn it to 33rpm (first click). Give the platter a helping hand up to speed as you do this. If the motor still scrapes against the underside of the platter when the platter has stopped any slight bouncing up and down following start-up, you will need to return to step 12 and increase the number of spacing washers. It is possible that you may be able to level the platter at a greater height but be careful not to damage the adjusters when attempting this. If the adjusters do not turn easily with your fingers, do not force them any further.
h. If the motor does not scrape on the underside of the platter, leave the record in place, re-fit the lid, increase the speed to 45 rpm and leave running for 48 hours.
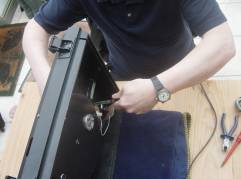
18. At the end of the 48 hour settling in period, re-check the platter level and adjust if necessary. Check that the motor has not vibrated loose so it can move horizontally; if it has re-tighten the mounting bolts and nuts. Also check that all wiring is secure and dressed correctly. Re-fit base by working from below with the turntable over the edge of the workbench.
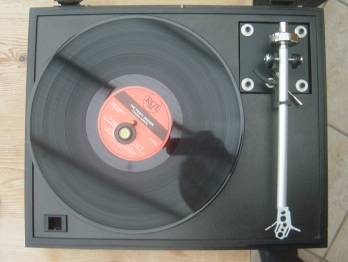
19. Re-check cartridge alignment, tracking weight and bias compensation. Put a record on the platter, add the strobe disc supplied by Origin Live and play the record. Using a suitable light source that flashes at 50Hz (a typical table lamp) adjust the speed at both 33 rpm and 45 rpm in accordance with the OL instructions (this ensures the speed is set with a typical load).
20. Remove the strobe disc, connect the turntable to your hi-fi and hear the improvement!
Belt Fitting
The motor pulley on a PT TOO sits in a groove on the underside of the platter, which in turn sits very close to the plinth top plate. This means that you cannot hold the belt away from the platter in order to loop it over the pulley as there is insufficient room for your fingers.
To get round this problem Pink Triangle supplied a short piece of pink ribbon that looped around the belt and could be easily pulled out once the belt had been located on the pulley. If you have lost the original pink ribbon (as I have), any piece of soft ribbon will do. To replace the belt:
1. Remove the lid (not essential, but gives you extra room).
2. Secure the pick-up arm, if fitted
3. Remove the platter. Ensure that you do not remove the top part of the inverted bearing in the process as it can take hours for the bearing to settle properly again due to air being trapped inside. It is best to either get someone to put their finger on the bearing to hold it down as you raise the platter or use a thumb to hold it down as you lift the platter with your fingers.
4. The belt will drop off during this procedure. Retrieve the belt for disposal or cleaning (with iso-propyl alcohol) and re-fitting.
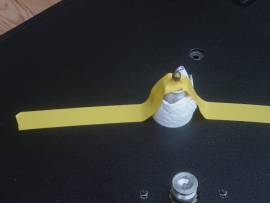
5. Turn the platter up-side down so you can fit the belt over the ribbon easily and install new or cleaned belt using ribbon as indicated.
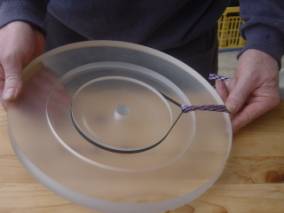
6. Flip platter right way up, place over bearing and holding both ends of the ribbon securely loop the belt over the motor pulley (seen through the platter) and lower the platter into place.
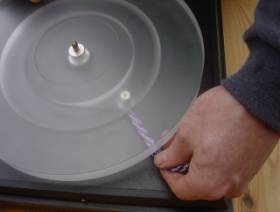
7. Let go of one end of the ribbon and carefully pull it from under the platter.
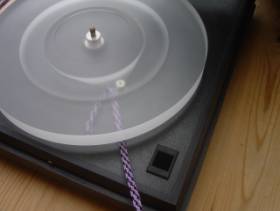
8. Job Done (put ribbon in a safe place for next time!)