Rega Turntable Motor Supply Kit Fitting Instructions
The results are really fantastic on my Rega turntable, however, when I checked your website for details of how to fit the motor it is obvious that the Rega deck has changed in design.
My method of inserting the new Rega turntable motor was a follows:
- Disconnect record deck power supply from the mains by removing the mains lead plug from the wall socket.
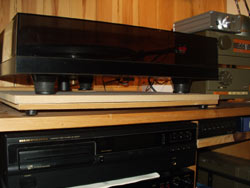
- Remove plastic cover, record support mat, glass platter and drive belt.
- Make sure tonearm is secure in the arm lock. Place deck inverted on a soft surface such as a pillow or cushion being careful to ensure that the sub-platter does not fall from the bearing.
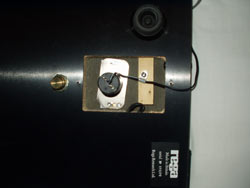
- Remove 2 screws holding plastic Rega motor cover plate to base of plinth.
- Remove wood screws holding Rega motor circuit board into recess in the plinth and unsolder the board from power supply cable and remove the power supply cable from the grommets.
- Carefully unscrew two plastic set screws which hold aluminium plate and motor to the thin laminate surface of the plinth and remove circuit board complete with the Rega motor and motor plate.
- Enlarge two fixing holes in aluminium motor plate with an M4 x 0.7 mm tap.
- Make up two set screws one of 4mm length and one 12 mm. (Size M4 x 0.7 mm.) (A second 4mm set screw can be used to refit the Rega components if required.)
- Replace the Rega aluminium plate with single 4mm screw.
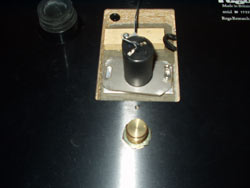
- Fit the Origin Live motor with Linn type mounting plate into the recess on the plinth. The 12mm long screw holds the Rega plate (tighten very gently as aluminium is very soft). Use one brass washer (Origin Live) and hold Origin Live plate with a 4mm nut tightened to ensure that the motor is just held by the nut. The new motor pulley should be just clear of the glass platter.
- The Origin Live pulley is of a smaller diameter than the Rega component. It is necessary to adjust the motor off centre so as to ensure that the belt is tensioned just enough to transmit the motor torque. The motor can be set roughly by offsetting it away from the sub-platter by a distance equal to the difference in the radius of the Rega pulley and that of the Origin Live pulley. The offset will be slightly more than this distance due to the geometrical differences in the set up.
- The new motor will now extend by approx 8mm below the Rega feet fitted to the deck. You can fit good supports such as Russ Andrews Oak Cone Feet or do as I do which is by using three tops from 35mm film canisters or anything 10mm thick or over. (Cheap, but effective). The motor can also be covered by a 35 mm film canister. This slides nicely into place on the 100 motor and has the benefit of holding the power supply cable tidily. (This latter idea has not been checked by Origin).
- I have found that the new motor runs quietest when the Rega belt runs on the lower of the two grooves on the new pulley.
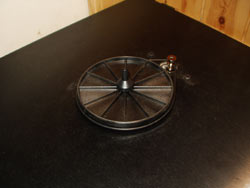
- I have also found that you can use a small 12 volt desk lamp to set the speed. The lamp should be set close to the Origin Live disc to provide good illumination. The eye responds better to black and white images by using the parts of the retina (light sensitive back of the eye) called rods. These structures are in more abundance away from the centre of focus of the eye. If you look slightly to one side of the correct ring of dashes on the speed disc you will find you can see a better image than looking straight at it! After using the 12 volt desk lamp remove it from the vicinity of your glorious music making set-up because these lamps hum like fury even when turned off.
- If you do wish to refit the Rega Turntable components remember that the mains cable supplies 240 volts to the Rega circuit board. The turntable cable should not be plugged into the mains until the Rega components have been reinstalled by a competent person and the plastic cover has been refitted.
If the above information is of help please use it. I wouldn’t want you to loose a sale because a potential customer cannot understand your instructions. The 4mm Allen socket head set screw method enables the Rega components to be refitted if desired. I had to do this at one point so I know it works!
Regards,
Mike Redman.


For Newer Rega turntables we recommend:
Carefully remove the the glued on thin motor cover plate from the Rega plinth. Now remove the origin live motor plate from the motor by undoing the 3 small screws that hold on the motor. Use the Origin Live motor plate as a template to drill 3 similar holes in the Rega motor cover plate for the 3 screws to fasten the Origin Live motor underneath it. Fasten the motor to the drilled Rega plate using the 3 small screws. you can now fasten the motor assembly to the plinth using 1 screw into the motor top plate and washers overlapping the edge of the plate so that you have belt tension adjustment.
The centre of pulley to centre of platter spindle should be 75mm to 79mm. 76mm is ideal to give correct belt tension for an Origin Live upgrade belt of 330mm long.
Enjoy your new Rega turntable motor.